
You already know that Lightning Web Components is a new programming model introduced by Salesforce for building Lightning components. In this article, we’ll discuss what tools you need to build Lightning web components and how to build one.
To create and develop Lightning Web Components and use their powerful features and performance benefits, you need to set up Salesforce DX. You also use Visual Studio Code, which is the recommended Salesforce development environment. You write a simple Lightning web component and add it to a page in Lightning Experience. Below are the steps to create a Lightning Web Component with conditional rendering.
Steps to build Lightning web components
- Setup Visual Studio Code
- Create a Project & connect to Salesforce org
- Create a Lightning web component
- Deploy & add to a Lightning page
1. Set Up Visual Studio Code
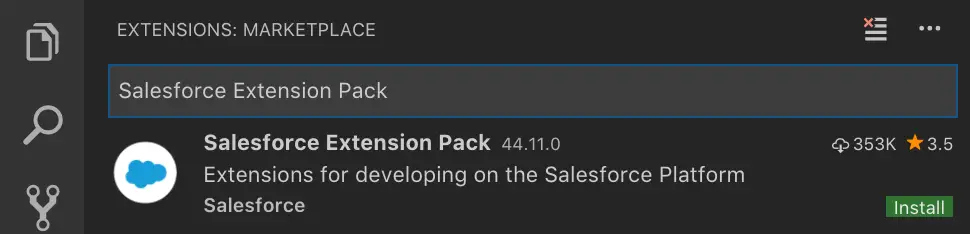
Visual Studio code editor has easy-to-install extensions for syntax highlighting, code completion, and more. First, install Salesforce extensions for Visual Studio Code. Search for Salesforce Extension Pack and click Install.
Search for Lightning Web Components and click Install. Re-launch Visual Studio Code to complete the installation.
Make sure the editor is ready by typing sfdx, you should see the commands already.
2. Create a Project & connect to Salesforce org
- In Visual Studio code, press Command + Shift + P on a Mac or Ctrl + Shift + P on Windows.
- Type SFDX.
- Select SFDX: Create Project
- Enter a Project Name & click create.
- Select SFDX: Authorize an Org. Login & Allow
Success message shows like this.
3. Create a Lightning web component
- In Visual Studio code, press Command + Shift + P on a Mac or Ctrl + Shift + P on Windows.
- Type SFDX.
- Select SFDX: Create Lightning Web Component.
- Press Enter to accept the default force-app/main/default/lwc.
Give a name to the component, say Cloud Fountain. This simple component displays the text ‘Hello Cloud Fountain’
This would be your HTML file. In this, we are displaying the text “hello {greeting}”. Note that greeting is a variable here
| <template> | |
| <lightning-card title=”HelloWorld” icon-name=”custom:custom14″> | |
| <div> | |
| <p>Hello, {upperCaseName}!</p> | |
| <lightning-input name=”last_name” label=”Last Name” onchange={changeHandler}></lightning-input> | |
| <template if:false={showLastNameOnly}> | |
| <div> | |
| <lightning-input name=”first_name” label=”First Name” onchange={changeHandler}></lightning-input> | |
| </div> | |
| </template> | |
| <lightning-input type=”checkbox” label=”Show Last Name only” onchange={handleCheckBox}></lightning-input> | |
| </div> | |
| </lightning-card> | |
| </template> |
view rawhelloWorld.html hosted with  by GitHub
This is the .js file. In this javascript file, we are assigning a value ‘Cloud Fountain’ to the variable called ‘greeting’. @track indicates, it is a variable.
| import { LightningElement, track } from ‘lwc’; | |
| export default class HelloWorld extends LightningElement { | |
| // @track greeting = ‘World’; | |
| @track firstName = ”; | |
| @track lastName = ”; | |
| @track showLastNameOnly = false; | |
| changeHandler(event) { | |
| // this.greeting = event.target.value; | |
| const fldValue = event.target.name; | |
| if(fldValue === ‘first_name’) | |
| this.firstName = event.target.value; | |
| else if(fldValue === ‘last_name’) | |
| this.lastName = event.target.value; | |
| } | |
| handleCheckBox(event){ | |
| this.showLastNameOnly = event.target.checked; | |
| } | |
| get showLastNameOnly(){ | |
| return this.showLastNameOnly; | |
| } | |
| get upperCaseName(){ | |
| if(this.showLastNameOnly){ | |
| return `${this.lastName}`.toUpperCase(); | |
| } | |
| else{ | |
| return `${this.firstName} ${this.lastName}`.toUpperCase(); | |
| } | |
| } | |
| } |
view rawhelloWorld.js hosted with by GitHub
This is the .xml file. In this file, we are setting isExposed to True implies, this component is available to be used in the Lightning pages. Which type of Lightning pages is defined in the targets.
| <?xml version=”1.0″ encoding=”UTF-8″?> | |
| <LightningComponentBundle xmlns=”http://soap.sforce.com/2006/04/metadata” fqn=”helloWorld”> | |
| <apiVersion>45.0</apiVersion> | |
| <isExposed>true</isExposed> | |
| <targets> | |
| <target>lightning__AppPage</target> | |
| <target>lightning__RecordPage</target> | |
| <target>lightning__HomePage</target> | |
| </targets> | |
| </LightningComponentBundle> |
view rawlcb.xml hosted with by GitHub
That’s it. Now you can deploy this project to Salesforce
4. Deploy & Add the component to Lightning Page
Just right click the file and select SFDX: Deploy Source to Org
After deployment, the lightning web component will be available in the App Builder as a custom component on the left side menu to use in the page.
Thank you for reading this post. Please feel free to leave feedback.